Average Reviews:

(More customer reviews)I bought this camera as a means to check my house while I am gone on vacation. I never heard of internet cameras before until recently while looking at PC catalogs. I ended up buying the DCS-900 because of the price and the good reviews I read here in Amazon.com. Let me tell what my experience has been so far.
Getting the camera setup on your local LAN is fairly straightforward. As long as you know the IP address of your router and how to do simple network configuration for the camera, you should be up and running in 10 minutes.
On the otherhand, configuring the camera for access from the web took me 2 days of searching for info on the Internet, emails to D-Link technical support, firmware upgrade for my router and constant rereading of the manuals and the D-Link Knowledge Base. Listen carefully because here's what they don't tell you about the product beforehand if you want access your camera from the web.
1) Camera's default port is 80. If you have Cable or DSL broadband, most ISPs do not allow access to port 80 to discourage their customers from setting up webservers on their network. You have to set the camera to some other port like 800 or so.
2) You must be comfortable with setting up your router and understand how port forwarding and virtual server table works. If you have a firewall, then you must make more configuration changes. Make sure you access to your broadband router and you feel comfortable making these changes. D-Link documentation only reference their own routers as examples.
3) If your broadband connection has Dynamic IP addressing which most cable and DSL subscribers do, you have to set up a Dynamic DNS account with services like DynDNS.org or TZO.com. There, you create a DNS address (i.e. - www.myname.com) that will map to the dynamic address of your broadband connection. The software on camera will perform updates to the Dynamic DNS for you if your IP address changes.
4) You will also need a static web service account for the ActiveX Xplug Control software to be located when accessing the camera. Essentially this is a place where you can host webpages onto for access from the Internet. My geocities.com account prevents me from uploading the xplug.ocx file onto the server w/o an upgrade to a premium account at this time.
5) Make sure your router has the latest firmware to support virtual servers. This was the last step that prevented me from making the camera visible on the net.
Soooo....after all these steps, I was very successful in getting my camera up and running just the way I want it. I think this is a great product and I highly recommend it. You do have to have a little bit of network experience to comfortably configure everything.
I can not give it the full five stars because I think the documentation was fairly lacking when it comes to describing what you need to do to set the camera up for Internet access. As a matter of fact, even the description for the camera setup itself was somewhat vague and very terse. However, once you get pass all that, I am happy to say that it all works well!!
Click Here to see more reviews about: D-Link DCS-900 10/100TX Home Security Internet Camera
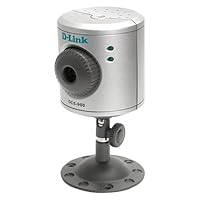
The DCS-900 Internet Camera is the latest video surveillance product utilizing the reliability and scalability of Fast Ethernet in an inexpensive remote monitoring solution. The DCS-900 features a built-in web server which bypasses the need for a PC to stream images directly to the Internet. By entering an IP address into any web browser, the easy-to-use web-based interface allows users remote access to their DCS-900 from anywhere at any time. Additional features include the ability to monitor up to four cameras at a time and to archive streaming video directly to your personal computer's hard drive.

Click here for more information about D-Link DCS-900 10/100TX Home Security Internet Camera
No comments:
Post a Comment