Average Reviews:

(More customer reviews)Update:
I attached a video recorded from the Active X viewer from Internet Explorer. I was at work when I connected and was surprised to see my older son in my younger son's crib! You should get an idea of the audio and video quality. The camera was in wireless mode. It created a .asf file, but I changed the extension to .wmv to upload to Amazon.This is from a perspective of a Mac user with Snow Leopard 10.6.4. I uploaded a bunch of screenshots of the setup screens.
PC users can extrapolate the logic.
The hardware is EXACTLY the same as the Sharx Security VIPcella-IR S. It is also the same as the y-cam-knight - Google it.
I decided to save 50% of the cost of the Sharx Security VIPcella-IR S since I am very comfortable with computers and networks. By reading the excellent review of the Sharx, they are mostly from the added software and support. Once you figure this camera out, it will perform exactly the same as the Sharx Security VIPcella-IR S. (I haven't tried the mini-sd card yet)
At first, I thought, I'll just use the Y-cam Mac setup software, but it didn't find the camera.
The VERY first thing I did was to plug an Ethernet cord to the back of the Camera so that it can get an IP address from my Airport Extreme Router.
Then you have to determine what IP was given to the Camera so you can connect to it via the browser. Just follow the steps in the screenshot.
Once you have the IP address, simply type it in Safari and the default username and password is admin / admin.
From there you can mess with the settings.
Be sure to download the FREE y-cam app from iTunes so you can use your iTouch or iPhone as a super clear baby monitor!
The unfortunate thing is that there is no sound.
TO ACCESS OUTSIDE YOUR HOME
If you want to access the camera outside of your home, it is best to give it a DHCP Reservation:
In the AirPort Utility, click DHCP
Then under DHCP Reservations, click the + sign
Give it a Description and select the MAC Address (I copied and pasted it from the "System" Screen of the Camera settings
Then give it a valid IP address.
So whenever you restart your Airport, it doesn't give the Camera a different IP address.
Then you have to Configure Port Mappings.
I changed the port of the camera to 8081 just in case someone randomly gets my home IP address. The default is port 80, which any browser will automatically connect.
Just change all the ports in the Port Mapping Setup Assistant in the Airport Utility to match the port you picked, and the Private IP address will be the IP of the camera you chose above.
If you are geeky enough to understand the above, then you can save yourself about $150 bucks from the Sharx since they apparently do a great job of simplifying it for the end user. The LTS is the SAME hardware, but it isn't as "Plug and Play" - Software and support make the Sharx a winner. I didn't have to call LTS support so I have no clue how they are.
All the other reviews to the Sharx in regards to performance will be relevant to this camera.
I'm thinking of buying another LTS LTCIP830MV-W Wireless IP Camera with 30 IR LEDs and MicroSD Card with the money I saved :-)
Hope this helped!
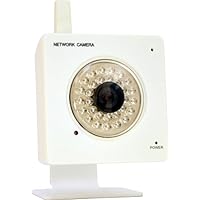
Click Here to see more reviews about: LTS LTCIP830MV-W Wireless+RJ45 640x480 IP Camera with 30 IR LEDs and MicroSD Card Recording, White
The LTS LTCIP830MV makes advanced technologies simple. The LTCIP830MV can connect to the Internet over wireless networking or 10/100 Ethernet lines. With simultaneous MPEG4 / MJPEG compression and 3GPP, the LTCIP830MV provides smooth live view with audio to multiple platforms including Apple Macs, iPhone and other 3G mobile phones. The user-friendly web-based set-up interface allows you to connect your camera anywhere and whenever you need. With 30 iR LEDs you can view objects in extreme low light conditions up to approximately 39 feet. Built-in MicroSD Card slot can store video directly to MicroSD Card without connecting to a network or PC.
 Get 5% OFF
No comments:
Post a Comment